原文:
WPF自定义控件 使用阿里巴巴图标
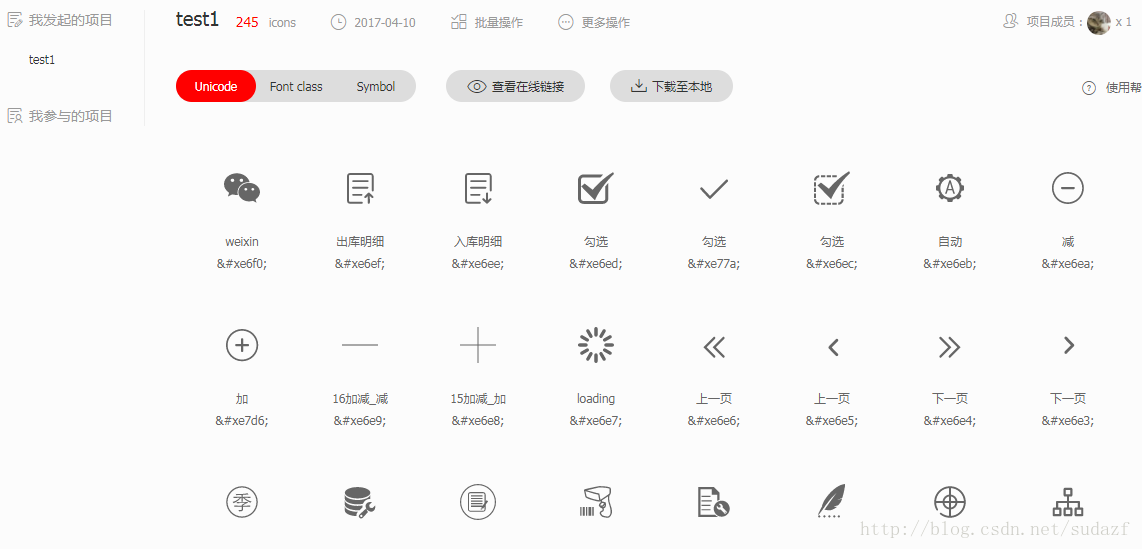
2.在项目下新建一个 Resources 文件夹,去阿里巴巴图标网站 http://www.iconfont.cn/ 下载 ttf 文件,放到该文件夹下,注意将此ttf文件的生成操作设置成 Resource ;
最终效果就是显示一个微信图标:
2)测试代码改成:
上一篇介绍了 WPF自定义控件 按钮 的初步使用,在进一步介绍WPF自定义控件 按钮之前,先介绍一下如何在WPF项目中使用阿里巴巴图标,方便以后做示例。
1.还是在上一篇项目基础上,在WPF自定义控件类库项目 Controls 文件夹下,新建一个资源字典(WPF)文件,取名: MyIcon.xaml ,并且添加如下代码:
<ResourceDictionary xmlns="http://schemas.microsoft.com/winfx/2006/xaml/presentation"
                    xmlns:x="http://schemas.microsoft.com/winfx/2006/xaml"
                    xmlns:local="clr-namespace:WpfCustomControlLibrary.Controls">

    <Style x:Key="MyIcon" TargetType="TextBlock">
        <Setter Property="FontFamily" Value="/WpfCustomControlLibrary;component/Resources/#iconfont"></Setter>
        <Setter Property="Foreground" Value="White"/>
        <Setter Property="TextAlignment" Value="Center"/>
        <Setter Property="HorizontalAlignment" Value="Center"/>
        <Setter Property="VerticalAlignment" Value="Center"/>
        <Setter Property="FontSize" Value="20"/>
    </Style>

</ResourceDictionary>
2.在项目下新建一个 Resources 文件夹,去阿里巴巴图标网站 http://www.iconfont.cn/ 下载 ttf 文件,放到该文件夹下,注意将此ttf文件的生成操作设置成 Resource ;
3.在Generic.xaml文件中,添加对MyIcon.xaml的引用:
<ResourceDictionary
    xmlns="http://schemas.microsoft.com/winfx/2006/xaml/presentation"
    xmlns:x="http://schemas.microsoft.com/winfx/2006/xaml"
    xmlns:local="clr-namespace:WpfCustomControlLibrary">

    <ResourceDictionary.MergedDictionaries>
            <ResourceDictionary Source="pack://application:,,,/WpfCustomControlLibrary;component/Controls/MyButton1.xaml"/>
            <ResourceDictionary Source="pack://application:,,,/WpfCustomControlLibrary;component/Controls/MyIcon.xaml" />
    </ResourceDictionary.MergedDictionaries>


</ResourceDictionary><Application x:Class="WpfApplication1.App"
xmlns="http://schemas.microsoft.com/winfx/2006/xaml/presentation"
xmlns:x="http://schemas.microsoft.com/winfx/2006/xaml"
xmlns:local="clr-namespace:WpfApplication1"
StartupUri="MainWindow.xaml">
<Application.Resources>
<ResourceDictionary>
<ResourceDictionary.MergedDictionaries>
<ResourceDictionary Source="pack://application:,,,/WpfCustomControlLibrary;component/Controls/MyIcon.xaml"/>
</ResourceDictionary.MergedDictionaries>
</ResourceDictionary>
</Application.Resources>
</Application>5.在测试项目中加入一个textblock用以测试:
<Window x:Class="WpfApplication1.MainWindow"
xmlns="http://schemas.microsoft.com/winfx/2006/xaml/presentation"
xmlns:x="http://schemas.microsoft.com/winfx/2006/xaml"
xmlns:d="http://schemas.microsoft.com/expression/blend/2008"
xmlns:mc="http://schemas.openxmlformats.org/markup-compatibility/2006"
xmlns:local="clr-namespace:WpfApplication1"
xmlns:controls="clr-namespace:WpfCustomControlLibrary.Controls;assembly=WpfCustomControlLibrary"
mc:Ignorable="d"
Title="MainWindow" Height="350" Width="525">
<Grid>
<Grid.RowDefinitions>
<RowDefinition></RowDefinition>
<RowDefinition></RowDefinition>
<RowDefinition></RowDefinition>
</Grid.RowDefinitions>
<Grid.ColumnDefinitions>
<ColumnDefinition></ColumnDefinition>
<ColumnDefinition></ColumnDefinition>
</Grid.ColumnDefinitions>
<Button Grid.Row="0" Grid.Column="0" Content="Default Button" Width="100" Height="50"></Button>
<controls:MyButton1 Grid.Row="0" Grid.Column="1" Width="80" Height="80" >
<controls:MyButton1.Content>
<TextBlock Text="MyButton1" Margin="10,30,10,10"></TextBlock>
</controls:MyButton1.Content>
</controls:MyButton1>
<TextBlock Grid.Row="1" Grid.Column="0" Text="" FontSize="50" Foreground="Green" Style="{StaticResource MyIcon}" ></TextBlock>
</Grid>
</Window>
最终效果就是显示一个微信图标:
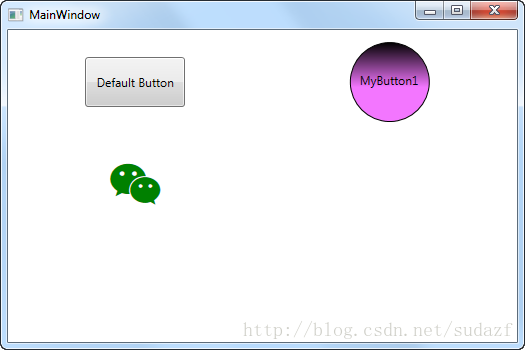
将这个icon图标和上一篇介绍的 MyButton1 结合起来使用,可以达到 图标按钮的效果,如:
1)将 MyButton1.xaml 改成:
<ResourceDictionary xmlns="http://schemas.microsoft.com/winfx/2006/xaml/presentation"
xmlns:x="http://schemas.microsoft.com/winfx/2006/xaml"
xmlns:local="clr-namespace:WpfCustomControlLibrary.Controls">
<ResourceDictionary.MergedDictionaries>
<ResourceDictionary Source="pack://application:,,,/WpfCustomControlLibrary;component/Controls/MyIcon.xaml" />
</ResourceDictionary.MergedDictionaries>
<ControlTemplate x:Key="MyButton1_Template" TargetType="{x:Type local:MyButton1}">
<Border x:Name="border" Background="{Binding RelativeSource={RelativeSource Mode=TemplatedParent}, Path= Background}"
Height="{Binding RelativeSource={RelativeSource Mode=TemplatedParent}, Path=Height}"
CornerRadius="2"
BorderBrush="{TemplateBinding BorderBrush}" BorderThickness="{TemplateBinding BorderThickness}"
Width="{Binding RelativeSource={RelativeSource Mode=TemplatedParent}, Path=Width}">
<!--Icon/Text-->
<StackPanel Orientation="Horizontal" VerticalAlignment="Center"
Margin="{TemplateBinding Padding}"
HorizontalAlignment="{TemplateBinding HorizontalContentAlignment}">
<TextBlock x:Name="icon" Margin="3"
RenderTransformOrigin="0.5,0.5" Style="{StaticResource MyIcon}"
Text=""
FontSize="30"
Foreground="Green">
<TextBlock.RenderTransform>
<RotateTransform x:Name="transIcon" Angle="0"/>
</TextBlock.RenderTransform>
</TextBlock>
<TextBlock VerticalAlignment="Center" x:Name="txt"
TextDecorations="{Binding RelativeSource={RelativeSource Mode=TemplatedParent}, Path=ContentDecorations}"
Text="{Binding RelativeSource={RelativeSource Mode=TemplatedParent}, Path=Content}" />
</StackPanel>
</Border>
</ControlTemplate>
<Style TargetType="{x:Type local:MyButton1}">
<Setter Property="Template" Value="{StaticResource MyButton1_Template}"/>
</Style>
</ResourceDictionary>2)测试代码改成:
<Window x:Class="WpfApplication1.MainWindow"
xmlns="http://schemas.microsoft.com/winfx/2006/xaml/presentation"
xmlns:x="http://schemas.microsoft.com/winfx/2006/xaml"
xmlns:d="http://schemas.microsoft.com/expression/blend/2008"
xmlns:mc="http://schemas.openxmlformats.org/markup-compatibility/2006"
xmlns:local="clr-namespace:WpfApplication1"
xmlns:controls="clr-namespace:WpfCustomControlLibrary.Controls;assembly=WpfCustomControlLibrary"
mc:Ignorable="d"
Title="MainWindow" Height="350" Width="525">
<Grid>
<Grid.RowDefinitions>
<RowDefinition></RowDefinition>
<RowDefinition></RowDefinition>
<RowDefinition></RowDefinition>
</Grid.RowDefinitions>
<Grid.ColumnDefinitions>
<ColumnDefinition></ColumnDefinition>
<ColumnDefinition></ColumnDefinition>
</Grid.ColumnDefinitions>
<Button Grid.Row="0" Grid.Column="0" Content="Default Button" Width="100" Height="50"></Button>
<controls:MyButton1 Grid.Row="0" Grid.Column="1" Width="100" Height="50" Content="MyButton1" Background="Orange" />
<TextBlock Grid.Row="1" Grid.Column="0" Text="" FontSize="50" Foreground="Green" Style="{StaticResource MyIcon}" ></TextBlock>
</Grid>
</Window>
那么 按钮将变成图标+文字的组合,如图: